
From sign-up to first session
in under 5 minutes.
Studio Splitz gets you operational fast. Here's exactly how the platform works from start to finish.
Setting up your studio
Create your account
Sign up with your email address. We verify it with a one-time code, then you set a secure password. That's your studio account.
- Email verification via one-time code
- Secure password with strength requirements
- Choose a plan (start free, upgrade anytime)
Meet Splitz AI
Your AI assistant walks you through the entire setup process conversationally. Just answer its questions and it configures everything for you.
- Name your studio and set your timezone
- Add your rooms with hourly rates
- Configure availability and booking rules
- Set up payment preferences and splits
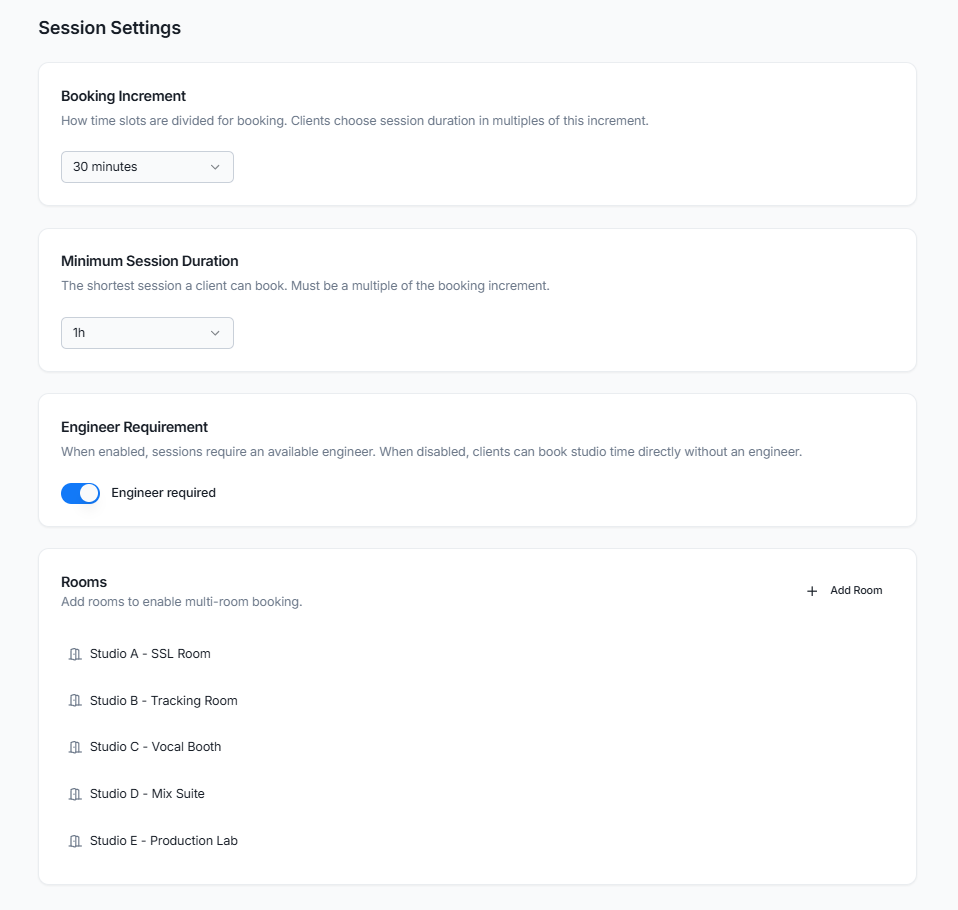
Configure your rooms
Add each room with its name, hourly rate, and availability schedule. Set minimum booking durations and dynamic pricing tiers.
- Per-room hourly rates and minimum durations
- Weekly availability schedules (including overnight)
- Dynamic pricing tiers for different session lengths
- Room descriptions and details for your booking page
Connect Stripe
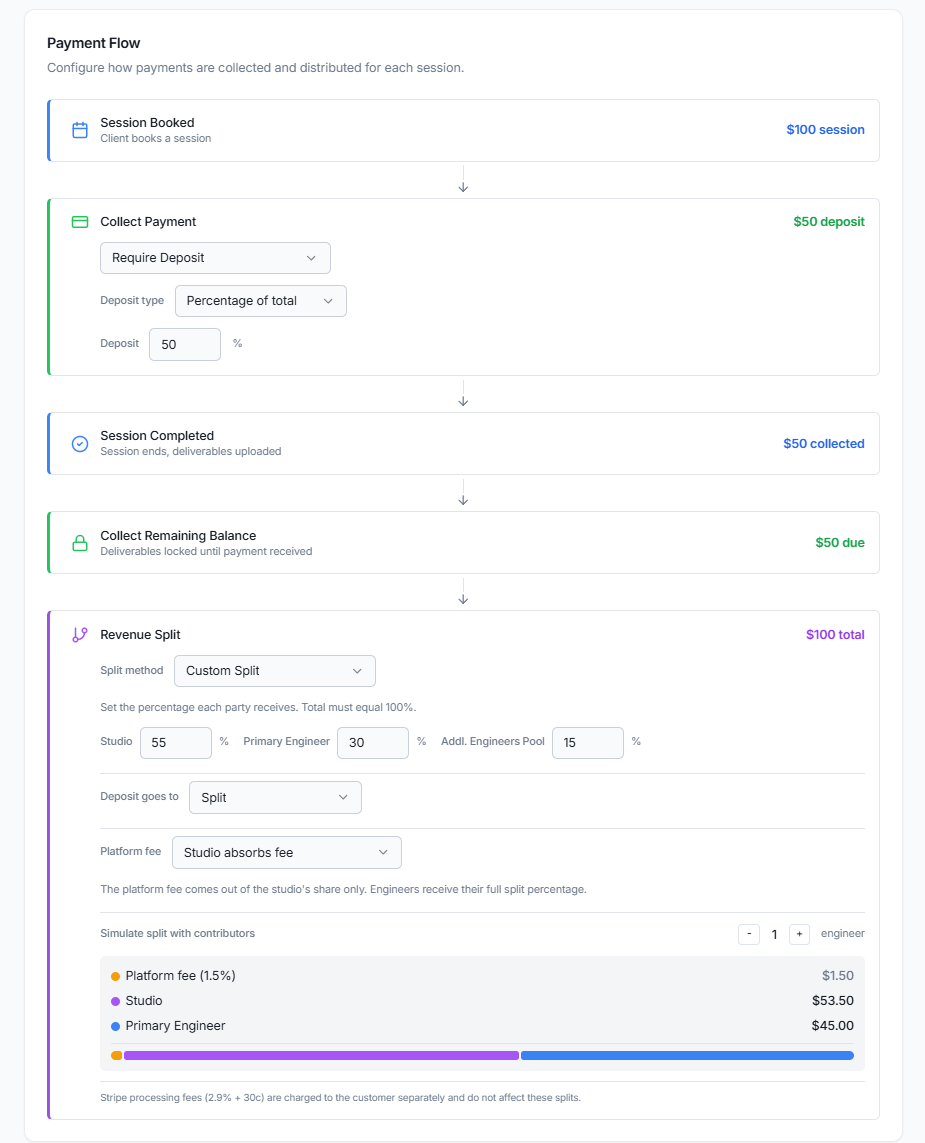
Connect your Stripe account to start accepting payments. Studio Splitz uses Stripe Connect so funds go directly to your account.
- Guided Stripe Connect onboarding
- Automatic fee calculation and split distribution
- Support for deposits and balance payments
- PCI-compliant - card data never touches your server
Share your booking page
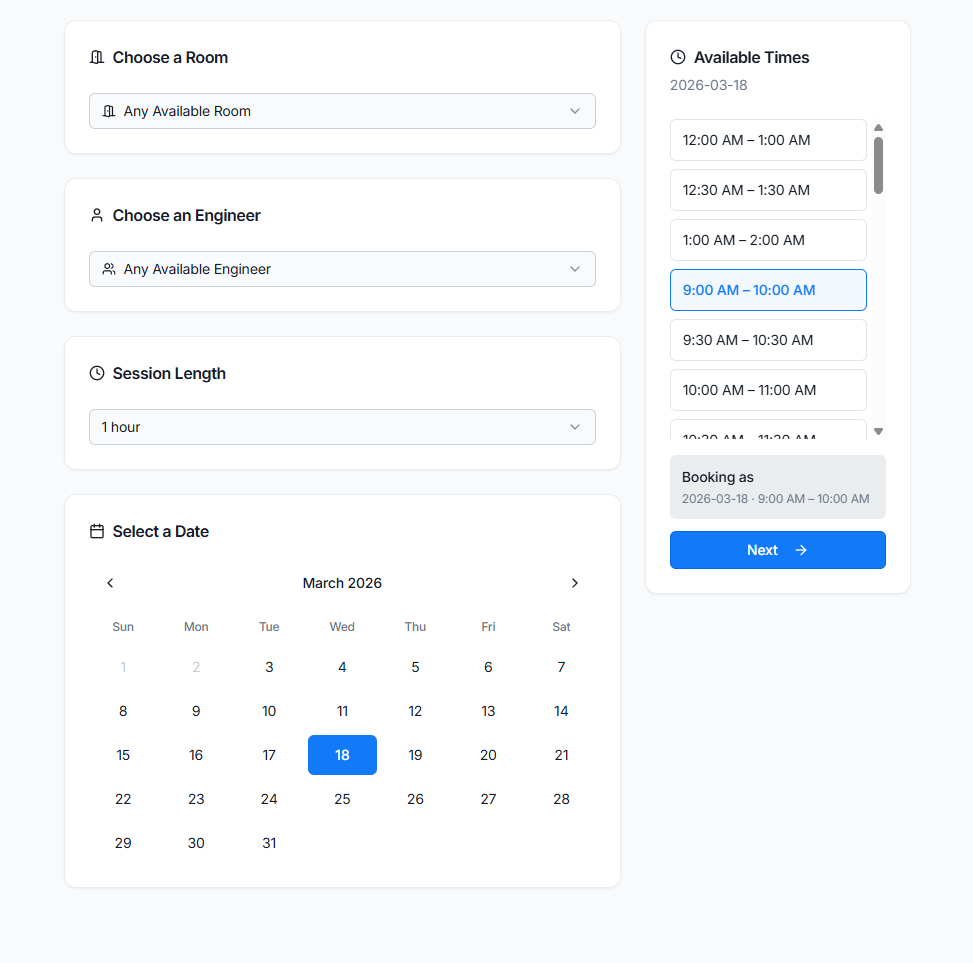
Your white-label booking page is ready. Share the link with clients and they can browse rooms, pick times, and pay - all in one flow.
- Custom branded URL (yourslug.studiosplitz.com)
- No client app download required
- One-time code login for returning clients
- Mobile-friendly booking experience
Grow and optimize
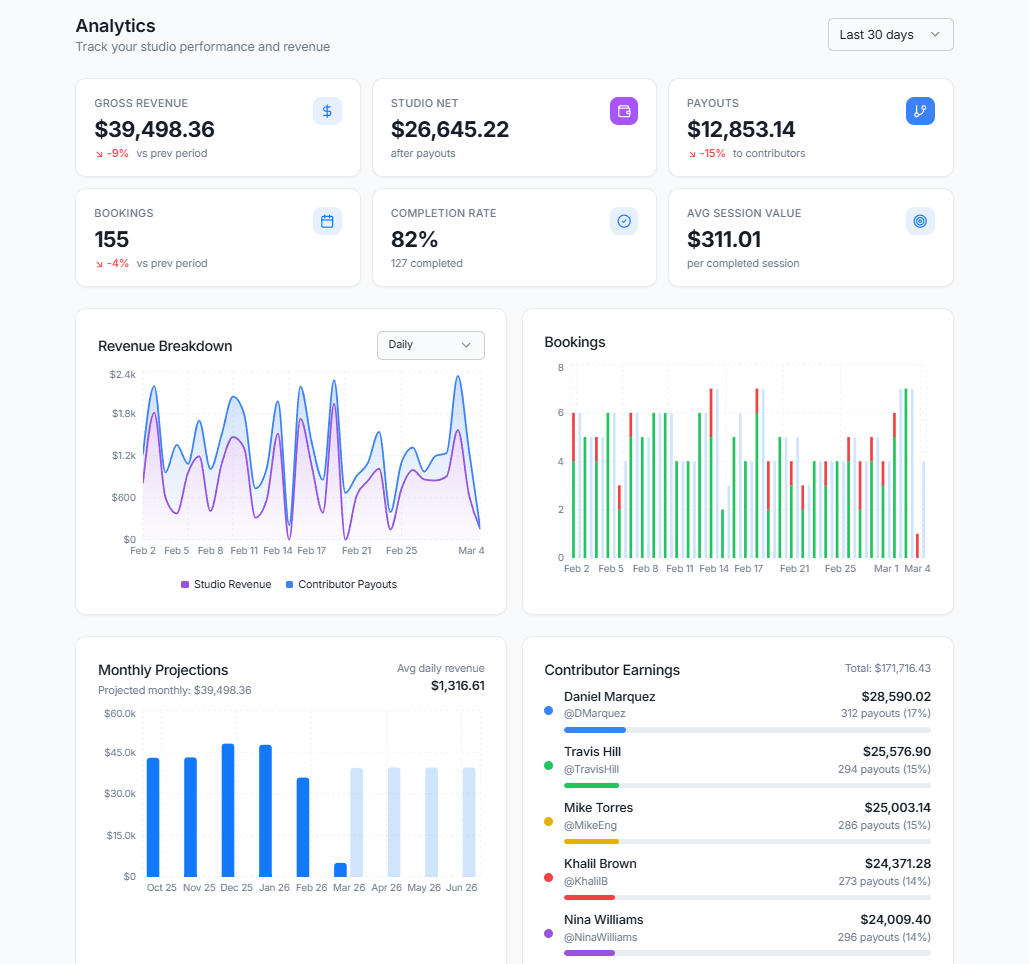
Track revenue, occupancy, and engineer performance in real-time. Use data to optimize pricing, scheduling, and operations.
- Revenue analytics with trend visualization
- Occupancy and utilization metrics
- Automated session reminders reduce no-shows
- Upgrade your plan as your studio scales
The complete workflow
From scheduling to file delivery, every step is connected.
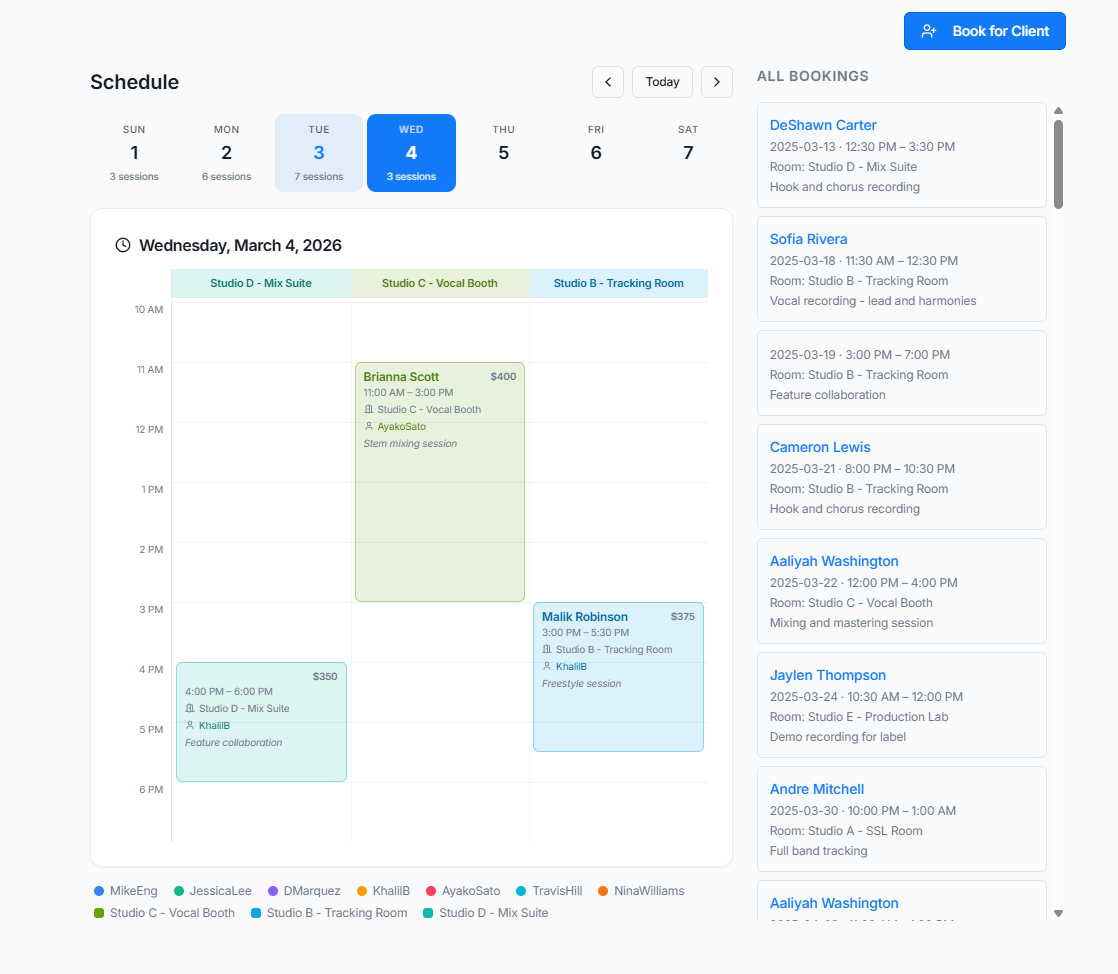
1. Schedule
Multi-room calendar with conflict detection
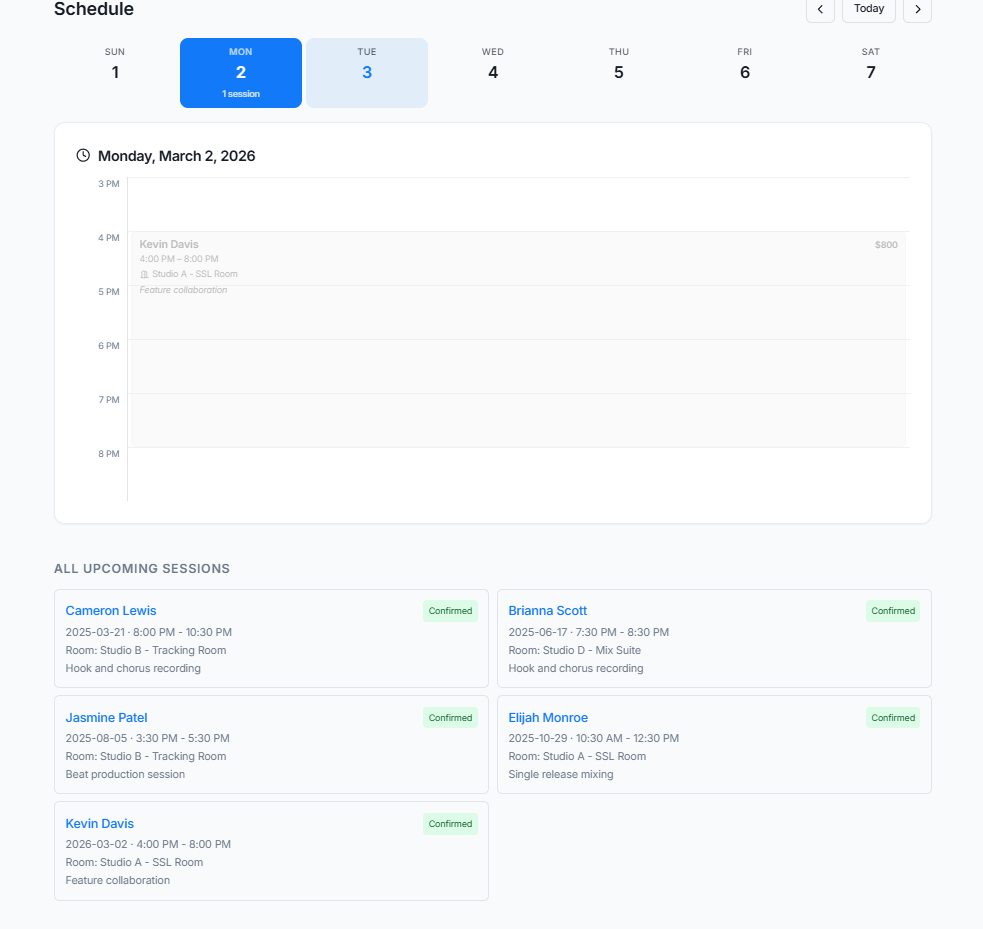
2. Session
Engineers and contributors see their assignments
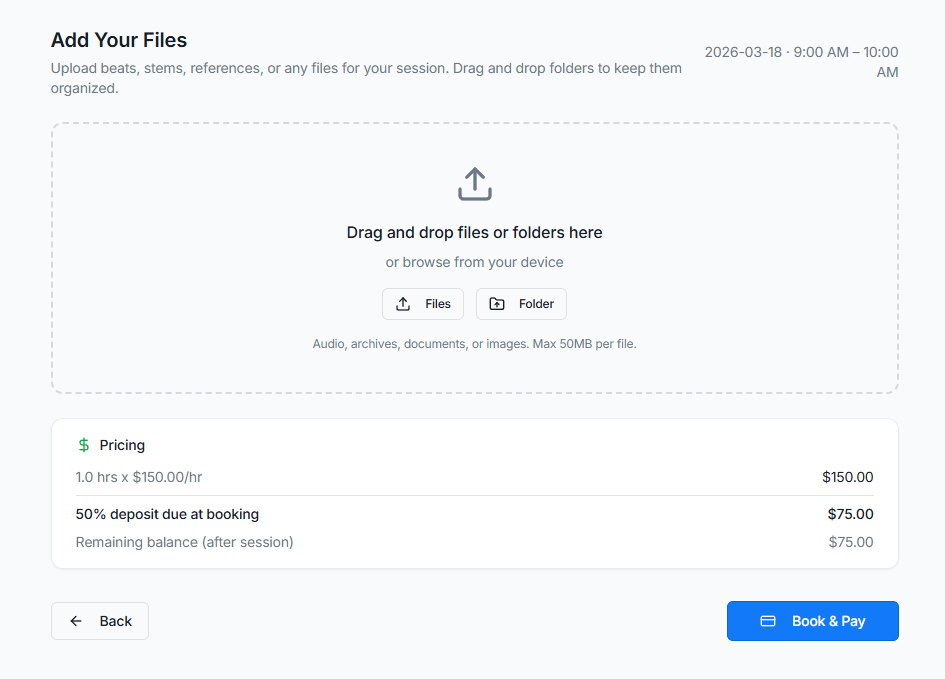
3. Deliver
Upload stems and mixes directly to the client
Three roles, one platform
Every user type gets a tailored experience designed for exactly what they need.
Studio Owner
- 1Create account and set up studio profile
- 2Add rooms, rates, and availability
- 3Connect Stripe for payments
- 4Invite engineers and configure splits
- 5Share your booking link with clients
- 6Track revenue and manage bookings
Engineer / Contributor
- 1Accept invitation from studio owner
- 2Set your weekly availability
- 3Get notified of assigned sessions
- 4Accept or manage your session schedule
- 5Track your earnings and payouts
- 6View analytics on your performance
Client / Artist
- 1Visit the studio's booking page
- 2Browse available rooms and engineers
- 3Pick your date, time, and session length
- 4Pay securely via Stripe checkout
- 5Get email reminders before your session
- 6Download session files after completion
Start running your studio smarter.
The Starter plan is completely free. Set up your studio, start booking sessions, and upgrade when you're ready.